![]()
WEB700
Web Programming Foundations
Schedule Notes Resources Graded Work MyApps Instructions Vercel Guide Code examplesWEB700 Week 12 Notes
Security Considerations
This week we will be covering some of the important items related to the security of websites and web applications. We will cover HTTPS communications at a high level, setting up SSL certificates with node.js, and getting our own free HTTPS SSL certificates from a trusted source. We will also cover how to encrypt and decrypt passwords using a common library used to do password encryption with node.js. Lastly, we will cover some additional topics related to accessing resources between domains and security standards in place to protect your website against malicious scripts or documents.
HTTPS
HTTPS is HTTP communication between a web browser and a server over a secure, encrypted connection, using TLS (Transport Layer Security). The primary purpose for using HTTPS is for users to be able to verify that a website that transfers sensitive data, can do so in a secure and safe manner. HTTPS uses SSL/TLS certificates on the server side that are used to encrypt the communication between the client and server so that packets in transmission between the client and server cannot be intercepted and used to either steal or forge information. The concept of capturing packets in the middle of transmission between client and server or vice versa, is called a man in the middle attack.
Imagine using your online banking website or logging in to your social media accounts only to have your login credentials stolen while they were in transit between your browser and the server receiving them. Without HTTPS communication the internet simply would not be secure at all.
Have a look at your favorite websites when you are about to login and look up to the left of the URL bar in your browser for a green lock icon in Chrome or Firefox. Click on it to view info about your connection with this website (screenshot taken in Firefox).
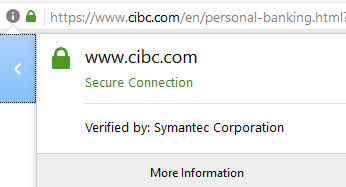
Notice how it shows that the site is using a secure connection and that the certificate is verified by Symantec Corporation. This means CIBC is using a TLS certificate for their HTTPS communications that was purchased from Symantec (the makers of Norton Antivirus).
Click on the ‘More Information’ for info about the certificate and connection. In Firefox you can see a little details pane like this:

This pane tells us the website is using a 256 bit certificate using TLS 1.2 and that communication was encrypted before being sent over the internet. Sending your login credentials and retrieving back your banking info is all using encrypted packets between your web browser and the server. Anyone who might capture them in transit would not be able to obtain any useful information from the packets.
Quick note: there are other security measures in place in the OSI stack that also make capturing these packets hard on it’s own as well, but that’s out of scope for this course. Just know that HTTPS encrypted communications is just one level of security implemented in the exchange of data between client and server.
From this pane there is also a View Certificate button. 
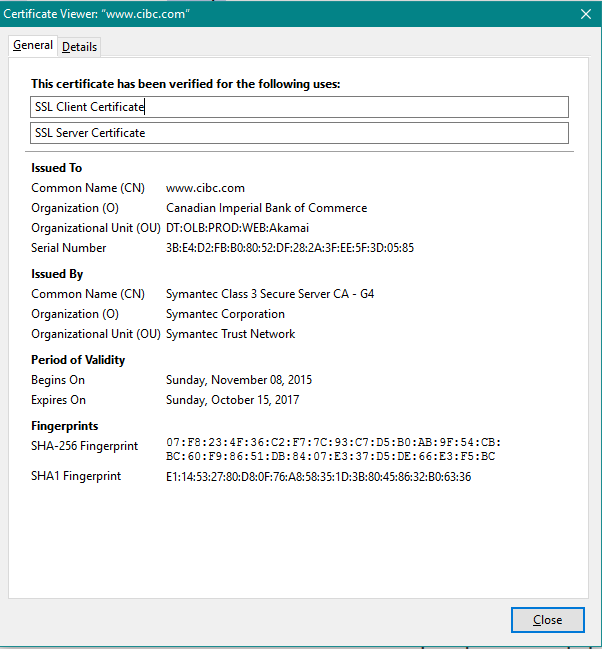
Clicking this button shows you the full details of the certificate, who it was issued to, who issued it, when it was issued, and when it expires. This information can be very useful for validating if a certificate used on a website is trustworthy and that the site itself uses proper security measures. Some websites will try to use their own ‘Self Signed Certificates’. We will get into that part next.
Bad HTTPS and self signed certificates
SSL/TLS certificates can be created on your own and technically they can be used, however using your own certificates is considered bad practice. The reason why is that using your own certificates will result in a warning from the browser that your website is using an untrusted certificate. The reason it is untrusted is that you created and signed it yourself and it was not generated by one of the well known certificate authorities on the web.
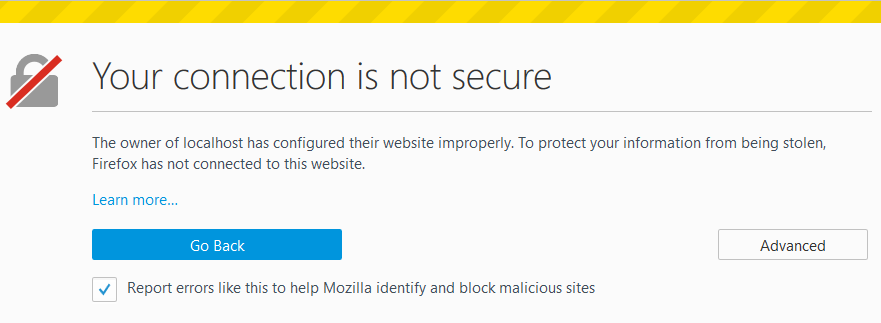
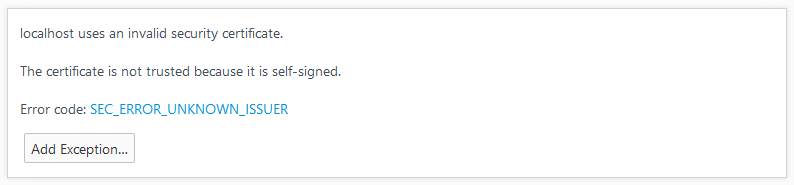
Large companies like Symantec, Go Daddy, Verisign, Digicert, etc are certificate authorities and they have root certificates that other certificates are generated under. All major browsers have these root certificates already installed in them and can use them to verify that your certificate was generated from a trusted source. The certificate contains information about its issue and expiry dates, the organization the certificate belongs to (Your company), the organizational unit within the company the certificate was generated for (usually IT), and more. Generating your own certificate and trying to use it will result in the following warning in Firefox to warn users that the certificate was self signed.
The certificate is not trusted because it is self-signed.
Creating our own self signed certificates for development and test purposes
We will generate our own self signed certificate and create a HTTPS server with node shortly that will run on localhost over port 4433, a custom HTTPS port (vs port 8080, our custom HTTP port).
If you have Git installed (and you should by now!) you can create your own certificate with one line using the openssl command.
openssl req -new -x509 -nodes -out server.crt -keyout server.key
We will get the following prompts for about the organization, etc. the certificate will be issued to. The only important one for now is the Common Name. Make sure it is localhost. This is the domain the certificate will be valid for. We will be testing it on localhost so make sure it’s correct.
Generating a 2048 bit RSA private key
.............................+++
...+++
writing new private key to 'server.key'
-----
You are about to be asked to enter information that will be incorporated
into your certificate request.
What you are about to enter is what is called a Distinguished Name or a DN.
There are quite a few fields but you can leave some blank
For some fields there will be a default value,
If you enter '.', the field will be left blank.
-----
Country Name (2 letter code) \[AU\]:CA
State or Province Name (full name) \[Some-State\]:ON
Locality Name (eg, city) \[\]:Toronto
Organization Name (eg, company) \[Internet Widgits Pty Ltd\]:ACME Widgets
Organizational Unit Name (eg, section) \[\]:IT Dept
Common Name (e.g. server FQDN or YOUR name) \[\]:localhost
Email Address \[\]:
Using SSL certificates in node.js
Using our own SSL certificates in node.js is a fairly simple process. We just have to issue the certificates or buy them from a trusted Certificate Authority online, and then point node to them and start up our web server with https as well as http so we can serve traffic on both HTTP and HTTPS connections.
Using our self signed certificate in node.js for development
Now that we have a server.crt file and a server.key file we can plug these into node and start up a HTTPS server. There will be a warning when we visit the site like we mentioned above because the certificates were generated on our own and not connected to a Certificate Authority.
Let’s take our week 12 example (available on GitHub) and add HTTPS to it for logins (NOTE: we will be working from the “examples” folder, so open it in Visual Studio Code once you have cloned it from the repository. Do not forget to issue the command “npm install” to obtain the required modules). In week12.js, we will need to add a require for fs to read the certificates from the file system, load the files and put them in an options object for the https server, use http and https to start the servers instead of starting it on the express app, and finally update the ports and assets locations.
Add the following code before “user” is declared. We will be overriding the HTTP_PORT and WEEK10ASSETS variables.
const fs = require("fs");
const http = require("http");
const https = require("https");

const HTTP_PORT = process.env.PORT || 8080;
const HTTPS_PORT = 4433;
const WEEK10ASSETS = "./week10-assets/";
const WEEK12ASSETS = "./week12-assets/";
const SSL_KEY_FILE = WEEK12ASSETS + "server.key";
const SSL_CRT_FILE = WEEK12ASSETS + "server.crt";

// read in the contents of the HTTPS certificate and key
const https_options = {
    key: fs.readFileSync(__dirname + "/" + SSL_KEY_FILE),
    cert: fs.readFileSync(__dirname + "/" + SSL_CRT_FILE)
};
This takes care of adding the https port for 4433 and reading in the certificates as well as updating the assets folder.
Next, replace your app.listen(HTTP_PORT, onHttpStart); code with the following:
// listen on ports HTTP_PORT and HTTPS_PORT. The default port for http is 80, https is 443. We use 8080 and 4433 here
// because sometimes port 80 is in use by other applications on the machine and using port 443 requires admin access on osx
http.createServer(app).listen(HTTP_PORT, onHttpStart);
https.createServer(https_options, app).listen(HTTPS_PORT, onHttpsStart);
We also add a function for when the https server starts as well to print to the console and let us know it’s running just like for http.
// call this function after the https server starts listening for requests
function onHttpsStart() {
    console.log("Express https server listening on: " + HTTPS_PORT);
}
Lastly, be sure to copy your self signed certificate key and crt files into the week12_assets folder so that our week12.js server can find them.
Let’s start it up (using the command: “node week12.js”) and point our browser at https://localhost:8080
You’ll notice, depending on your browser that you will get a security warning if everything is working ok. If you get this warning (with “Advanced” selected) everything is working as intended so far.
Warning in Firefox
Warning in Chrome
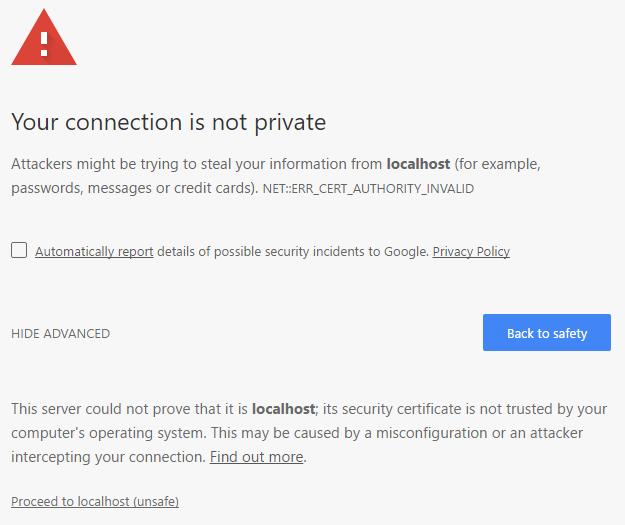
NOTE: If you do not see the option to “Proceed to localhost”, then typing “thisisunsafe” will allow you to proceed.
Accept the warnings to add an exemption and proceed to the page.
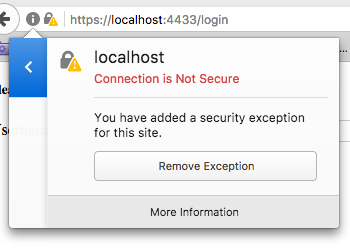
Click the icon to the left of the url bar like before to examine the self signed cert.
Warning in Firefox
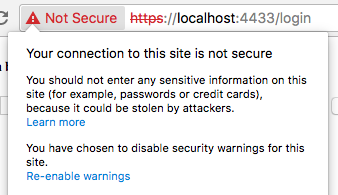
Warning in Chrome
Now, after accepting or adding an exception for the warning you should see your login page under https and be able to login with the same credentials as we used in week 10.
Letsencypt.org, free HTTPS certificates forever
Let’s Encrypt is an open source project that is overseen by of The Linux Foundation. The purpose of Let’s Encrypt is to offer free SSL/TLS certificates from a trusted Certificate Authority. Traditionally, web developers have had to purchase SSL certificates from a limited set of Certificate authorities for prices that would range from a few dollars to thousands depending on the complexity of the certificate. The issue with this is these SSL certificates can be generated in a matter of milliseconds and cost virtually nothing to create yet companies charge a lot of money for them and it makes SSL and HTTPS prohibitive for a lot of smaller websites out there.
Let’s Encrypt wants to make SSL/TLS certificates available for free, forever in order to create a more secure and privacy respecting internet. They have received support from the major web browsers and their root Certificate Authority is trusted by all major web browsers now. This means you can generate your own SSL Certificate using their infrastructure and it will be trusted by the web browser. You can enable SSL on your website for free and just have to renew the certificates every 90 days (the renewal process can be automated).
Using Let’s Encrypt with Node.js
We won’t be able to actually get Let’s Encrypt working with an example in this class. The reason is that it requires a custom domain that is publicly available on the web, so that the Let’s Encrypt servers can connect to it and issue a certificate. Since all of our (free) Vercel applications all use the default appname.vercel.app domain, they are already SSL-enabled and can be accessed by using https, for example: https://appname.vercel.app.
There are a few libraries out there that integrate the Let’s Encrypt environment into Node or the command line to allow generation of certificates: greenlock-express, and greenlock-cli are excellent tools for integrating into express or just using the command line to get certificates.
Let’s Encrypt allows you to generate a certificate that will last 90 days and then has to be renewed. However, as mentioned above, they offer functionality to automatically renew the certificates when they are are few days from expiry. Code examples can be found on the Greenlock github page as well as information about the Let’s Encrypt infrastructure and the process for generating certificates. Further information about Let’s Encrypt including their staging environment, certificate compatibility, revoking certificates, etc. can be found on the Let’s Encrypt documentation pages.
Password Encryption
Using HTTPS is a large part of having a secure web site but it’s not everything. Another large piece of security is encrypted passwords. Using HTTPS to send and receive encrypted communications is great for avoiding some forms of attacks but it won’t save you if someone gets into your database and steals all your users’ passwords that are stored in plain text. This is where you will want to think about using an encryption library that can encrypt data for you “one way”. What do we mean by one way encryption? It means the data is encrypted in such a way that it cannot be reversed back into plain text. In order to check if encrypted data matches some plain text data you have to encrypt the plain text data using the same method that was originally used and then compare if the encrypted data matches.
This is a standard way to store and work with passwords. Encrypt them in the database when a user registers and when they try to login, encrypt their plain text password that is sent to the server over a HTTPS POST request, encrypt it and compare the encrypted passwords for a match. This way you are never storing users’ plain text passwords in the database and anyone who has access to the database cannot read them.
A great node.js library to use for the one way encryption of passwords is bcrypt.js. We can grab it using npm and include it in our solution using:
const bcrypt = require('bcryptjs');
If we wish to encrypt a plain text password (ie: “myPassword123”), we can use bcrypt to generate a “salt” and “hash” the text:
// Encrypt the plain text: "myPassword123"
 bcrypt.hash("myPassword123", 10).then(hash=>{ // Hash the password using a Salt that was generated using 10 rounds
    // TODO: Store the resulting "hash" value in the DB
})
.catch(err=>{
    console.log(err); // Show any errors that occurred during the process
});
Similarly, if we wish to compare the “hashed” text with plain text (to see if a user-entered password matches the value in the DB), we use:
// Pull the password "hash" value from the DB and compare it to "myPassword123" (match)
bcrypt.compare("myPassword123", hash).then((result) => {
    // result === true
});

// Pull the password "hash" value from the DB and compare it to "myPasswordABC" (does not match)
bcrypt.compare("myPasswordABC", hash).then((result) => {
    // result === false
});